Ruby, Github API, OSX Desktop Notification များ နှင့် ငပျင်းကျွန်တော်
Cross-posted from Medium.
ကျွန်တော် OSX သုံးကာစက သုံးနေရင်း သတိထားမိတာ တစ်ခုက စခရင် ထောင့်မှာ ပေါ်ပေါ်လာတဲ့ notification လေးတွေပဲ။ တစ်ခါတစ်ခါ အလုပ်လုပ်နေရင် အာရုံနောက်လောက်အောင် ပေါ်ပေါ်လာတယ်။ သေချာချာ စဉ်းစားကြည့်ရင်တော့ notification ဆိုတာ သိအောင်အကြောင်းကြားတာဖြစ်လို့ အာရုံစူးစိုက်မိအောင်လုပ်နိုင်တာပဲ ချီးကျူးရမှာပေါ့လေ။
အဲ့ကတည်းက ကိုယ့်ဘာသာကိုယ် သတိပေးချင်တဲ့ ကိစ္စတွေမှာ အဲ့ဒါလေးတွေ သုံးကြည့်မယ်လို့ တွေးထားမိတယ်။ ဒါပေမဲ့ ဘယ်လိုသုံးရမလဲဆိုတာတော့ မရှာမိဘူး။ သေချာတာကတော့ OSX native မဟုတ်တဲ့ app တွေကအစသုံးနေတာဆိုတော့ သုံးလို့ရတဲ့ api တစ်ခုခုတော့ရှိမှာပဲပေါ့။
အဲ့ဒီနောက်ပိုင်းမေ့မေ့ပျောက်ပျောက်ပဲ အဲ့ကိစ္စနဲ့ ပတ်သက်လို့ ဘာမှလည်း မစမ်းဖြစ်ဘူး။ ခုတစ်လောကျမှ ပြန်သတိရလာတယ်။ သတိရလာပုံက အခုလို..
ကျွန်တော့်လက်ရှိအလုပ်က အဓိက communication tool အဖြစ် slack ကိုသုံးပြီး အလုပ်သတ်မှတ်ချက်တွေကိုတော့ github issue တွေအဖြစ်နဲ့ ရေးပေးလေ့ရှိတယ်။ slack ကအမြဲတမ်းဖွင့်ထားရင် ကိုယ်က တစ်ခြား ဘက်ကို အာရုံစိုက်နေတဲ့အချိန် ဟိုဘက်က တစ်ခုခု ပြောလာရင် desktop notification တက်တယ်။ ဒါပေမဲ့ github မှာ issue တစ်ခုခုတင်တာပဲဖြစ်ဖြစ် မှတ်ချက်ပေးတာပဲ ဖြစ်ဖြစ် လုပ်ရင် တန်းမသိဘူး။ ဒါ့ကြောင့် github repo ကို browser tab တစ်ခုနဲ့ ဖွင့်ထားပြီး web app ရဲ့ notification ကိုသွားသွားစစ်နေရတယ်။ ထုံးစံအတိုင်း ပရိုဂရမ်မာအာရုံအရ အလုပ်တစ်ခုခု ခဏခဏ ဆင်တူလုပ်နေရပြီ၊ ခက်ခက်ခဲခဲလုပ်နေရပြီဆိုရင် ကို အပျင်းတစ်လာတယ်။ ကိုယ့်ဘာသာမလုပ်ပဲ ကွန်ပျူတာကို အလိုလိုလုပ်ခိုင်းချင်လာတယ်။ အမှန်တော့ ခက်ခက်ခဲခဲလို့ ပြောရလောက်အောင်တော့ မဟုတ်။ browser tab လေးဖွင့် refresh လုပ်ရတာပဲ။ ဒါပေမဲ့ ကိုယ့်အတွက်တော့ တော်တော်ပင်ပန်းတဲ့ ကိစ္စကြီးဖြစ်နေတယ်။ အဲ့တော့ slack လိုမျိုး github ကလည်း desktop notification လေးပေးရင် ကောင်းမှာပဲလို့ စဉ်းစားမိတယ်။
အဲ့ဒါနဲ့ github desktop app လေးတွေမှာ များ အဲ့ဒီfeature ပါမလား လျှောက်ရှာကြည့်တော့လည်း မတွေ့။ ရှားရှားပါးပါးတစ်ခုတွေ့တာက အလကားမရ။ ကြားထဲမှာတော့ github desktop app လေးတစ်ခုနှစ်ခုသွင်းကြည့်သေးတယ်။ ကိုယ်လိုချင်သလို မဖြစ်ပြန်ဘူး။ ဒါနဲ့ နောက်ဆုံး ကိုယ့်ဟာကိုယ် ရေးမဟဲ့ ဆိုပြီး မာန်တင်းရတော့တယ်။
ကိုယ်သုံးချင်တာကို စဥ်းစားလိုက်တော့ အကြမ်းဖျင်းအားဖြင့် github မှာ notification ရှိတာနဲ့ desktop notification ပေါ်ဖို့ပဲ။ ခက်တာက github api မှာ streaming push notification မရှိဘူး။ အဲ့တော့ web socket နဲ့ ထိုင်စောင့်နေလို့လဲမရဘူး။ Repo တွေမှာ webhook ထည့်လို့ရပေမဲ့ ကိုယ့်စက်မှာ public ip မရှိတော့ url ပေးလို့အဆင်မပြေ။ အဲ့တော့ အဖြေက polling ပဲ။ ကျွန်တော့်အလုပ်သဘာဝအရ github noti ကလည်း ခဏခဏ တက်နေမှာမဟုတ်တဲ့ အပြင် ကျွန်တော်က ချက်ချင်း စက္ကန့်ပိုင်းအတွင်းသိစရာလည်း မလို။ပြောရရင် တစ်နာရီလောက်တစ်ခါ စစ်ရင်တောင် အဆင်ပြေတယ်။ အဲ့တော့ ကိုယ်လုပ်ဖို့လိုတာက တစ်နာရီတစ်ခါ github api ကိုခေါ် noti ရှိမရှိစစ် ရှိရင် ရှိကြောင်း desktop noti ပြ၊ မရှိရင်လည်း မရှိကြောင်း desktop noti ပြဖို့ပဲ။
github api ကတော့ http နဲ့ပဲ ခေါ်ခေါ် api client တစ်ခုပဲ သုံးသုံးဖြစ်တယ်။ မသိသေးတာက desktop noti ပြတဲ့ကုတ်ပဲ။ အဲ့တော့မှ OSX notification ဘယ်လိုရေးရလဲဆိုတာ စရှာဖြစ်တယ်။
နည်းလမ်းတွေကတော့ အစုံပဲ။ applescript နဲ့ ရေးတာ၊ command line ကနေခေါ်တာ စသဖြင့်ပေါ့။ အဲ့မှာ သတိထားမိသွားတာက terminal-notifier gem ပဲ။ သူက CLI app အဖြစ်သုံးလို့ရအောင်ထုတ်ပေးထားတဲ့ gem ဆိုပေမဲ့ Ruby နဲ့လည်း require လုပ်ပြီး သုံးလို့ရတယ်ဆိုတော့ ကိုယ့်အတွက်တော်တော်အဆင်ပြေနေပြီ။
github api အတွက်ကတော့ octokit.rb ကိုပဲသုံးလိုက်တယ်။ ကိုယ့် အကောင့်ရဲ့ noti ယူမှာဖြစ်လို့ authenticate လုပ်ဖို့တော့လိုတယ်။ ကိုယ့်စက်ထဲမှာပဲထားမဲ့ script ဆိုဖြစ်တာတစ်ကြောင်း env variable တွေနဲ့ဆိုအလုပ်ပိုရှုပ်မှာတစ်ကြောင်းကြောင့် အခုလိုမျိုး username, password ကို inline ပဲထည့်ရေးလိုက်တယ်။ လုံတော့မလုံခြုံဘူးပေါ့။
|
|
notification ယူတာကတော့ လွယ်လွယ်လေးရယ်။
|
|
ရလာတဲ့ notis json က array format (ဒီမှာ ကြည့်လို့ရတယ်)။ Array က empty ဖြစ်နေရင် noti မရှိဘူးပေါ့။ မဖြစ်ရင်တော့ noti ရှိတယ်။ အဲ့တော့ အကြမ်းဖျင်း စမ်းလို့တော့ရပြီ။ noti ရှိရင်ရှိတယ်လို့ desktop noti ပြမယ် မရှိရင်တော့ မရှိဘူးလို့ပြမယ်။
|
|
အဲတော့ desktop_notify ကို implement လုပ်ဖို့လိုပြီ။ ဒါနဲ့ terminal-notifier ရဲ့ ruby documentation ကိုဖတ်တယ်။ အရှင်းဆုံး သုံးလို့ရတဲ့နည်းကတော့ ကိုယ်ပေးချင်တဲ့ message ကို param ပေးပြီး ခေါ်တာပဲ။
|
|
အဲ့တော့ desktop_notify ရဲ့ implementation က အခုလိုဖြစ်သွားတယ်။
|
|
ပြန်ပေါင်းရေးလိုက်ရင် အခုလိုဖြစ်သွားပါမယ်။
|
|
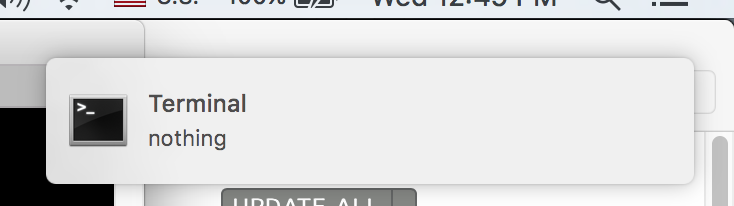
run လိုက်တော့ nothing ဆိုတဲ့ notification တက်လာပါတယ်။ github မှာ လောလောဆယ် ဘာမှ နိုတီမရှိသေးဘူးကိုး။
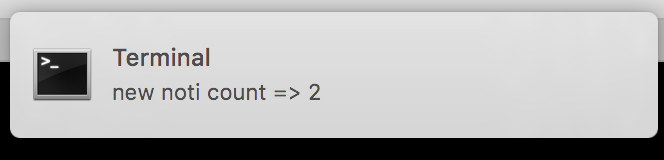
ဒါနဲ့ github မှာ noti တစ်ခုဖန်တီးပြီး run ကြည့်တော့ အခုလိုပေါ်ပါတယ်။
ခုတိုင်းကတော့ ကျွန်တော်လိုချင်တဲ့ ပုံစံရနေပါပြီ။ ဒါပေမဲ့ internet မရတဲ့အခါ crash မဖြစ်သွားအောင် အနိမ့်ဆုံး error handling တစ်ခုလောက်တော့ထည့်သင့်တယ်လို့တွေးမိတယ်။ ဒါနဲ့ github api call တဲ့ ကုတ်တစ်ခုလုံးကို ရိုးရိုးပဲ begin rescue block တစ်ခုနဲ့ အုပ်လိုက်တယ်။ ပြီးတော့ StandardError exception တွေကို rescue လုပ်လိုက်တယ်။ တော်တော်လျော့တိလျော့ရဲ လုပ်လိုက်တာလို့တော့ပြောလို့ရတယ်။ ဒါပေမဲ့ လောလောဆယ်က အလုပ်ဖြစ်ဖို့အရေးကြီးတယ်လေ။ ပြီးမှလိုအပ်လာရင် ပိုကောင်းအောင် ထပ်လုပ်လို့ရတာပဲ။
|
|
အခုလိုပြင်ပြီး အင်တာနက်ပိတ်ပြီး စမ်းကြည့်လိုက်တယ်။
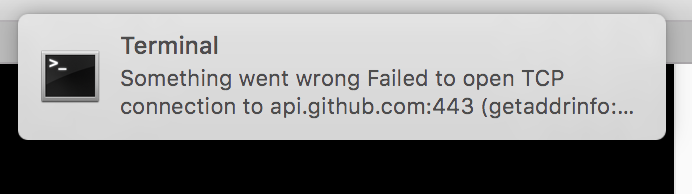
ဒါဆိုရင်တော့် တော်တော်ဟုတ်သွားပြီ။ error တက််ရင်လည်း ကြည့်ရှင်းလို့ရပြီပေါ့။
အဲ့တော့ နောက်ဆုံးအဆင့်ကတော့ ဒီ script ကိုတစ်နာရီခြား တစ်ခါ run ဖို့ပဲ။ ပထမဆုံး ပြေးမြင်တာကတော့ whenever gem ပဲ။ သူက cron job တွေကို ruby syntax နဲ့ သတ်မှတ်လို့ရတယ်။ အမှန်တော့ကိုယ့်ဘာသာ cron job ရေးလည်းရပေမဲ့ whenever နဲ့ ဆို cron syntax ကိုမှတ်နေစရာမလိုတော့တဲ့ အတွက် သူ့ပဲသုံးဖို့ ဆုံးဖြတ်လိုက်တယ်။
ပထမဆုံး reference လုပ်ရလွယ်အောင် ကိုယ့် home ထဲမှာ folder တစ်ခုဆောက်လိုက်တယ်။ ‘/Users/cmsh/github_noti’ ဆိုပါတော့။ ပြီးတော့ အပေါ်က ruby script ကို ‘/Users/cmsh/github_noti/notifier.rb’ ဆိုပြီး အထဲကိုရွှေ့လိုက်တယ်။
whenever နဲ့ သုံးဖို့ ‘/Users/cmsh/github_noti/config/schedule.rb’ ဆိုပြီး ထပ်ဆောက်လိုက်တယ်။ (အသေးစိတ်ကတော့ whenever README မှာ ဖတ်ကြည့်ပါ။) ကိုယ်လိုချင်တာက တစ်နာရီခြားတစ်ခါ အဲ့ဒီ script ကို run ဖို့ဖြစ်တဲ့အတွက် schedule.rb မှာ ခုလိုရေးလိုက်တယ်။
|
|
အပေါ်တစ်ကြောင်းကတော့ ဘာမှမဟုတ်ဘူး။ script error တက်ခဲ့ရင် log စစ်လို့ရအောင်ထည့်လိုက်တာ။ အောက်မှာတော့ တစ်နာရီခြားတစ်ခါ command တစ်ခု run တာပါပဲ။ whenever က rake task နဲ့ လည်းသုံးလို့ရပေမဲ့ dependency တစ်ခုထပ်ပိုနေမှာစိုးလို့ ရိုးရိုး ruby နဲ့ ပဲ run လိုက်တယ်။ အဲ့မှာလည်း environment ပြဿနာတွေတက်သေးတယ်။ ကိုယ်က rbenv နဲ့ ruby သွင်းထားတာဆိုတော့ system ruby မသုံးဘူး။ အဲ့တော့ rbenv ကပေးထားတဲ့ shim ကိုသုံးရတယ်။ အဲ့လိုနဲ့ ‘/Users/cmsh/.rbenv/shims/ruby’ ဆိုတဲ့ command ဖြစ်သွားတယ်။ နောက်မှတ်လောက်သားလောက်တစ်ချက်က whenever မှာ relative path တွေသုံးရတာတိုင်ပတ်လို့ အကုန် absolute path ပြောင်းပစ်လိုက်တာပါပဲ။
schedule.rb ရေးပြီးပြီဆိုရင်တော့ project root ကနေ
whenever --update-crontab
လို့ run ရုံနဲ့ cron job က စ run ပါပြီ။ သေချာအောင်
crontab -l
နဲ့ စစ်လိုက်ရင်
|
|
ဆိုတဲ့ entry ကိုတွေ့ရမှာပါ။ တစ်နာရီခြားတစ်ခါ github ကိုစစ်ပြီး noti ပေးတဲ့ end-to-end setup ပြီးပြီလို့ဆိုရမှာပါ။
စာကြွင်းအနေနဲ့ ပြောရရင်တော့ ကျွန်တော့် စက်မှာ မူလရေးခဲ့တဲ့ script ကတော့ noti တစ်ခုချင်းဆီကိုမှ subtitle နဲ့ logo image တွေထည့် ရလာတဲ့ noti အမျိုးအစားပေါ်မူတည်ပြီး message ပြောင်းပြတာတွေလုပ်ထားသေးတယ်။ အဲ့ဒါတွေကတော့ github api documentation နဲ့ terminal-notifier ruby documentation မှာ ကြည့်ပြီး စာဖတ်သူလည်း စိတ်ကြိုက်ဆက်လုပ်နိုင်တာမို့ အသေးစိတ်မပြောတော့ဘူး။ နောက်တစ်ခုကတော့ whenever နဲ့ crontab မသုံးချင်ရင် ‘LaunchControl’ ဆိုတဲ့ GUI app နဲ့ လည်း Apple က ပေးထားတဲ့launchd daemon agent တွေရေးလို့ရပါသေးတယ်။ ကျွန်တော့်စက်မှာတော့ အဲ့ဒီ ‘LaunchControl’ app နဲ့ပဲသုံးထားပါတယ်။ အဲ့ဒါနဲ့ ဆိုရင် screenshot ဖမ်းရမှာပျင်းတာနဲ့ CLI ကနေ whenever ပဲသုံးလိုက်တယ်လို့ ဝန်ခံပါကြောင်း။
by dreamingblackcat
21-Sep-2016